
How to Choose the Best Outdoor Lighting for Your Project?

Choosing the best Outdoor Lighting begins with a clear question: what should people see, and where should the light fall? A front path needs even, comfortable illumination. A garden wall may need a softer wash, while a work area needs enough light to reveal steps, tools, and surface details. The right choice depends on the site, not just a fixture’s brightness.

Energy matters, too. The U.S. Department of Energy reports that LEDs use at least 75% less energy and last up to 25 times longer than incandescent lighting. Those figures offer a useful comparison, though real performance depends on product quality, operating hours, and conditions outdoors. Check the fixture’s lumen output, color temperature, weather rating, and controls before deciding. A bright lamp is not automatically a better lamp. Sometimes it creates glare on wet paving or shines into a neighbor’s window.

Lighting researcher Dr. Mark Rea’s work emphasizes that light’s effects depend on its amount, timing, and context; this is a paraphrase of his research, not a direct quotation. That idea is useful outdoors, where a small, well-aimed beam can make a path safer without flooding the yard. Still, there is no perfect setup for every project. Start with the areas that matter, test the effect after dark, and adjust what feels too harsh or too dim. The first plan may need changing.
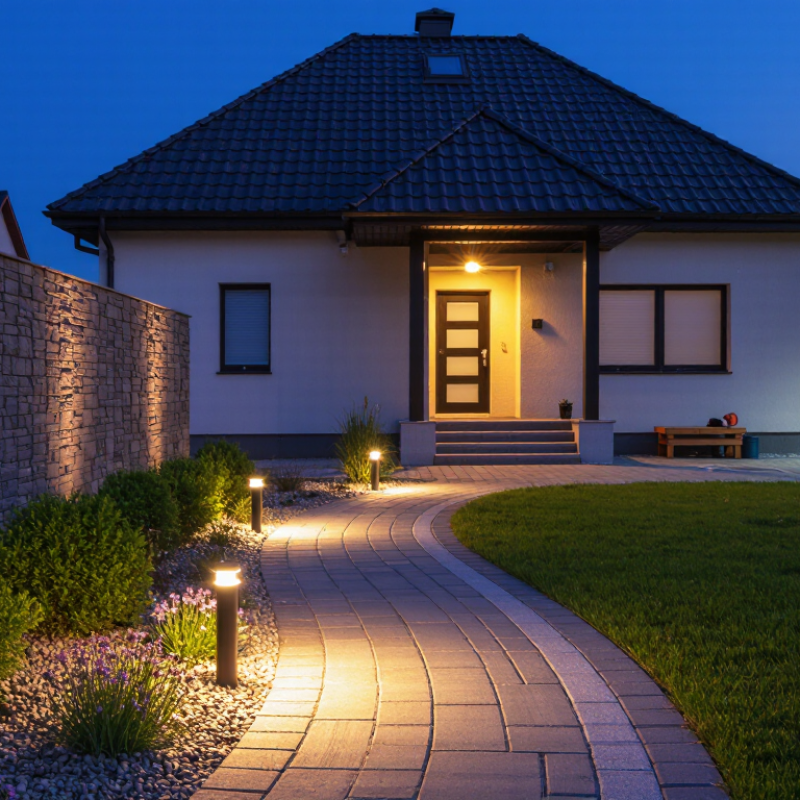
How to Choose the Best Outdoor Lighting for Your Project?

Assess the Site and Its Outdoor Lighting Needs

Before choosing outdoor lighting, walk the site after sunset. Daylight hides uneven paths, dark corners, glare from pale walls, and changes in elevation. Record how people move, where vehicles turn, and which areas need attention. Measure mounting height, available power, drainage, and exposure to weather. Do not rely on a daytime sketch alone. Real conditions matter. An entrance may need gentle visibility, while steps require clearer light and controlled shadows. Overlighting can make a space feel harsh and reduce nighttime comfort. That mistake is easy to make.

Match the lighting purpose to the site’s actual risks and activities. Use low, even illumination along walkways, focused light near stairs, and restrained accents around planting. Check beam direction from eye level. Light should guide people, not shine into bedrooms or passing drivers. Consider wet ground, salt air, dust, and seasonal tree growth before selecting fixtures. A fitting that works in October may disappear behind branches in June. Weather ratings matter, but installation quality matters just as much. Poor seals and loose cable entries can undermine reliable equipment. Consult a qualified electrician when circuits, timers, or buried cables are involved.

Tips: Take photos from walking height at dusk. Mark glare zones on the plan. Test one fixture before buying many. Ask someone with limited vision to review the route. Your own eyes may miss uncomfortable contrast.

How to Choose the Best Outdoor Lighting for Your Project?

Assess the site by identifying how each outdoor area is used, then compare its lighting requirement with a practical target illuminance level.

Typical planning targets are shown in lux, the amount of light reaching a surface. Entrances, stairs, and ramps generally require higher illumination because people need clearer visibility for orientation and safe movement. Confirm final levels with local building codes, accessibility requirements, glare limits, and the specific site conditions.

Define the Project’s Lighting Goals and Constraints

Before selecting fixtures, define what the outdoor space must accomplish. A pathway needs safe visibility, while a restaurant terrace needs comfort and atmosphere. List target areas, operating hours, user behavior, and maintenance access. Record existing darkness, glare sources, tree cover, and nearby residences.

Use measurable criteria. The Illuminating Engineering Society recommends evaluating illuminance, uniformity, glare, and visual adaptation for outdoor applications. For energy planning, the U.S. Department of Energy reports that LED lighting uses at least 75% less energy and can last up to 25 times longer than incandescent lighting. These figures support efficient design, but they do not replace site testing. A bright fixture can still create harsh shadows or disturb adjacent properties. Less light may perform better.

Constraints deserve equal attention. Check voltage, trenching limits, drainage, wind exposure, and the project’s maintenance budget. Choose suitable ingress protection for wet locations, and verify control compatibility before installation. Warm color temperatures often reduce visual harshness, yet the final choice should match safety needs and local requirements. IES RP-8 provides guidance for roadway and parking-area lighting, but every site has different risks. A perfect brief rarely exists. Revisit assumptions after a nighttime walk-through, preferably with temporary mock-ups. One overlooked tree can change the entire lighting pattern.

Compare Outdoor Lighting Types and Technologies

Outdoor lighting should match the project’s purpose, climate, and maintenance capacity. LED fixtures usually provide strong efficiency, long service life, and precise beam control. They work well for pathways, patios, façades, and security zones. However, cheap LEDs can produce harsh glare or uneven color. Check lumen output, beam angle, color temperature, and the fixture’s IP rating before installation.

Low-voltage systems offer safer installation and flexible placement around gardens or seating areas. They are useful when cables must follow winding paths. Halogen lamps can create warm, attractive light, but they consume more energy and generate noticeable heat. Solar lighting avoids trenching and wiring, yet performance drops during cloudy periods or winter months. It needs realistic expectations. A shaded corner may never receive enough daylight.

Smart controls add timers, motion sensors, dimming, and zone management. These features can reduce wasted energy, but complicated settings may discourage everyday use. Test the controls at night, not only during installation. In one garden project, I once chose fixtures that looked perfect on paper but created glare from a wet stone path. The mounting height was wrong. I had to reposition several lights and lower their brightness. That experience changed my approach: observe reflections, walk through the space, and check how light affects nearby windows. Good outdoor lighting should reveal surfaces clearly without making the night feel overexposed.

Select Fixtures, Light Levels, and Controls

Choosing outdoor lighting starts with the task, not the fixture’s appearance. A path needs even guidance, while a patio may need softer, wider light. For exposed areas, select fixtures with an appropriate ingress protection rating. Weather resistance alone does not prevent glare or poor placement. I once positioned a bright fitting near eye level. It made the entrance feel less safe. That mistake changed how I assess beam direction and mounting height.

Set light levels by use and surface color. Pale paving reflects more light than dark stone. Too many lumens can flatten textures and disturb nearby rooms. Warm white light often suits residential gardens, but the best color depends on plants and architecture. Use lower output near bedrooms and higher, controlled output at steps. Start with less. Measure after dark. A simple lux meter helps, though visual judgment still matters. Avoid aiming fixtures directly at windows or passing drivers.

Controls should be planned with the wiring. Photocells can respond to dusk, timers can limit operating hours, and motion sensors can brighten occasional routes. Separate zones for entrances, paths, and entertaining areas make adjustments easier. Manual override is valuable during gatherings or maintenance. Use weather-rated connections and have a qualified electrician verify installation where local rules require it. Do not assume automation is always better. Sensors may trigger from pets, branches, or passing headlights. Test the system across several evenings, then adjust brightness, timing, and angles. The first setting is rarely perfect.

How to Choose the Best Outdoor Lighting for Your Project? - Select Fixtures, Light Levels, and Controls

Project Area Recommended Fixture Typical Light Level Typical Output per Fixture Recommended CCT Optical Guidance Control Strategy Key Selection Criteria
Residential Walkways Bollard, path light, or low-level post fixture 0.5–2 footcandles
5–20 lux
300–800 lumens 2700–3000 K Wide, shielded distribution with low glare Astronomical timer, photocell, or occupancy sensor Use even spacing and keep light directed toward the walking surface.
Residential Steps Step light, recessed wall light, or surface-mounted fixture 1–3 footcandles
10–30 lux
100–500 lumens 2700–3000 K Shielded downward light; avoid direct views of the LED source Photocell with time-based dimming Provide consistent illumination on treads, risers, and landings.
Driveways and Small Parking Areas Area light, wall pack, or pole-mounted LED fixture 0.5–2 footcandles
5–20 lux
2,000–8,000 lumens 3000–4000 K Full-cutoff optics to limit spill light and glare Photocell, schedule, and occupancy-based dimming Confirm mounting height, uniformity, and property-line light trespass.
Commercial Parking Areas Pole-mounted area or shoebox fixture 0.5–3 footcandles
5–30 lux
8,000–30,000 lumens 3000–4000 K Asymmetric distribution selected by pole layout Photocell, astronomical timeclock, and scheduled dimming Design for target average illumination, uniformity, glare control, and local codes.
Building Entrances Canopy light, wall sconce, or downlight 2–5 footcandles
20–50 lux
1,000–5,000 lumens 3000–4000 K Downward or shielded distribution focused on doors and signage Occupancy sensor with high-low dimming and after-hours schedule Avoid excessive contrast between the entrance, surrounding path, and interior lobby.
Security Perimeters Full-cutoff floodlight or wall-mounted area light 1–3 footcandles
10–30 lux
2,000–12,000 lumens 3000–4000 K Controlled beam aimed across the monitored zone, not toward observers Motion sensor, photocell, and adjustable time delay Prioritize uniform coverage, camera compatibility, and minimal spill into neighboring properties.
Landscape and Trees Well light, adjustable spotlight, or in-ground uplight Accent lighting; generally lower than circulation lighting 200–1,500 lumens 2700–3000 K Narrow or adjustable beam aimed at trunks, foliage, or architectural features Astronomical timer with late-night dimming or shutoff Use glare shields, avoid aiming into windows, and protect vegetation from excessive heat.
Outdoor Signage Sign light, linear graze light, or adjustable floodlight Based on sign contrast and applicable sign regulations 500–5,000 lumens 3000–4000 K Uniform wall-wash or grazing distribution with concealed sources Photocell and curfew schedule Check sign brightness limits, viewing angles, and local ordinances before installation.
Wet or Coastal Locations Sealed exterior fixture rated for the installation environment Select according to the task area 300–10,000 lumens 2700–4000 K Optics matched to the task, with sealed lenses and appropriate shielding Photocell, timer, and occupancy control where suitable Verify the required wet-location rating, corrosion resistance, drainage, and cable-entry protection.
Design note: Final illumination levels should be verified with a photometric layout and adjusted for mounting height, surface reflectance, fixture spacing, local regulations, energy codes, and site-specific safety requirements.

Plan Installation, Safety, and Ongoing Maintenance

How to Choose the Best Outdoor Lighting for Your Project?

Plan Installation, Safety, and Ongoing Maintenance

A successful outdoor lighting plan starts with the site, not the fixture. Walk the property after sunset and mark dark steps, slippery paths, and blind corners. Note nearby trees, irrigation lines, drainage routes, and areas exposed to strong wind. Select fixtures with suitable weather protection for each location. A covered porch needs different protection than an open garden bed. Keep light directed downward to reduce glare for neighbors, drivers, and people using the path.

Installation should follow local electrical codes and permit requirements. Use outdoor-rated cables, sealed connections, and appropriately protected power supplies. Low voltage does not mean zero risk. A qualified electrician should inspect mains connections and unclear wiring conditions. Place cables where digging will not damage them later. Leave gentle service loops near connections, but avoid loose cable that collects water. I once underestimated root growth beside a walkway, and the cable needed repositioning within a year. Plans can be wrong.

Maintenance begins before the system is switched on. Create a simple seasonal checklist. Clean lenses, remove leaves, test timers, and check for flickering or damaged insulation. Trim plants before they block beams or touch hot components. After heavy rain, inspect for standing water around junctions. Keep a record of repairs and changing light levels. Small faults become expensive when ignored. Reflect on the design each season; a light that seemed useful in winter may create unnecessary glare in summer.

Go to Top